How and Where to Sell My Game - Microsoft Store
"Publish your game on the Microsoft Store! Learn how to become a developer, submit your game, and optimize your store listing for success."
Have you just finished the long process of creating your game and don't know where to sell it? The Microsoft Store can also be a great option.
In this sequence of posts, I'll give you tips on where and how to publish your game in the most varied channels so that it can be successful. There are channels that are not as well known, but that have a loyal audience and that can be great places for you who are starting and even for those who already have several games published and want to increase the reach and income of these games.
The Microsoft Store (formerly Windows Store, prior to April 2017) is a digital delivery platform for Microsoft Windows. It started as an app store for Windows 8 and Windows Server 2012 as the main way of distributing Universal Windows Platform (UWP) apps. With Windows 10, however, Microsoft merged its other distribution platforms (Windows Marketplace, Windows Phone Store, Xbox Video and Xbox Music) into the Microsoft Store, making it a unified distribution point for games, apps, video, digital music and e-books.
How to become a Microsoft Store Developer?
First, you'll have to apply to become a Microsoft developer. This can be done at this link:
https://developer.microsoft.com/en-us/store/register/
You will need to have a Microsoft account, and when you register you will have two options:
Individual – $19 USD Company – $99 USD
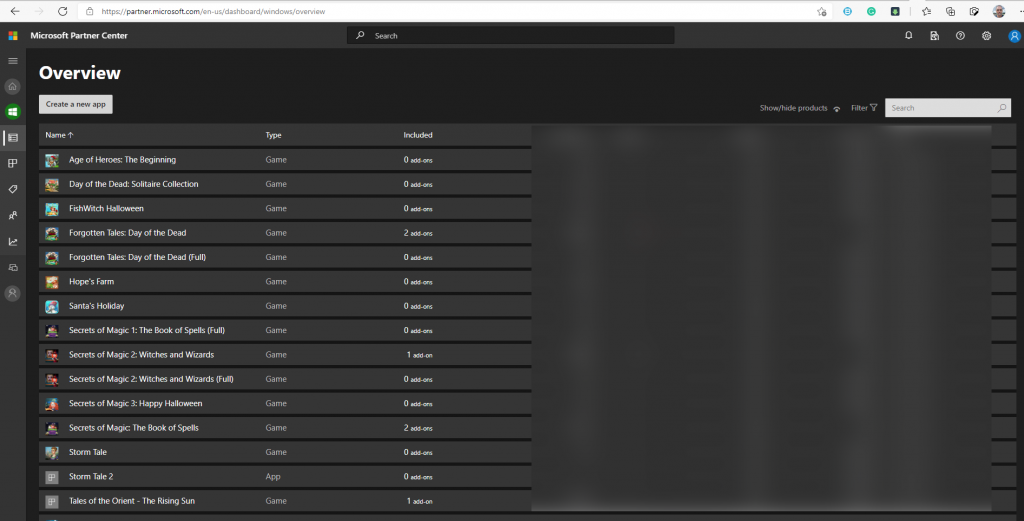
The fee is only charged once, and you can publish as many games and apps as you like. Choose what's best for your situation, complete your registration, pay and that's it, you'll have access to the Microsoft Partner Center and you'll be able to publish your first game!
Publishing Your Game
Let's start the process of publishing a new game to the Microsoft Store.
Fist we need to click on “CREATE NEW APP”.
First wee need to define a name for your App/Game, that needs to be unique on Microsoft Store.
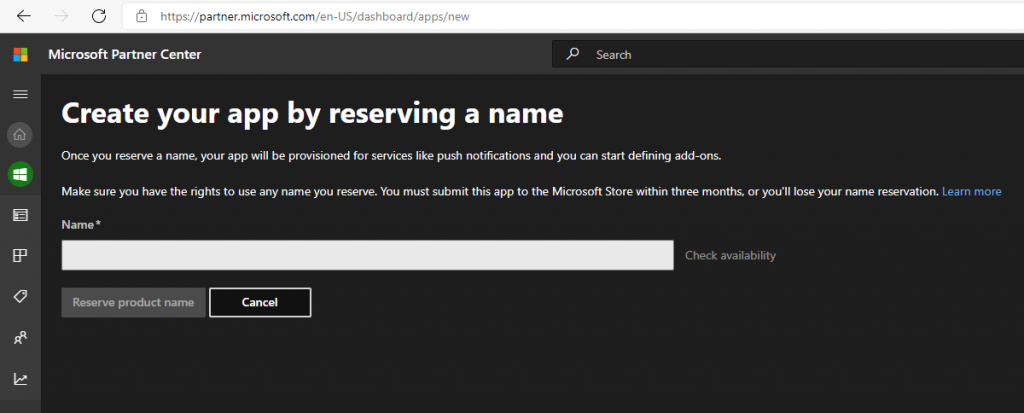
Enter your game name and then click on “Reserve App Name”.
After that, click on “Start Your Submission” to start the application submission process.
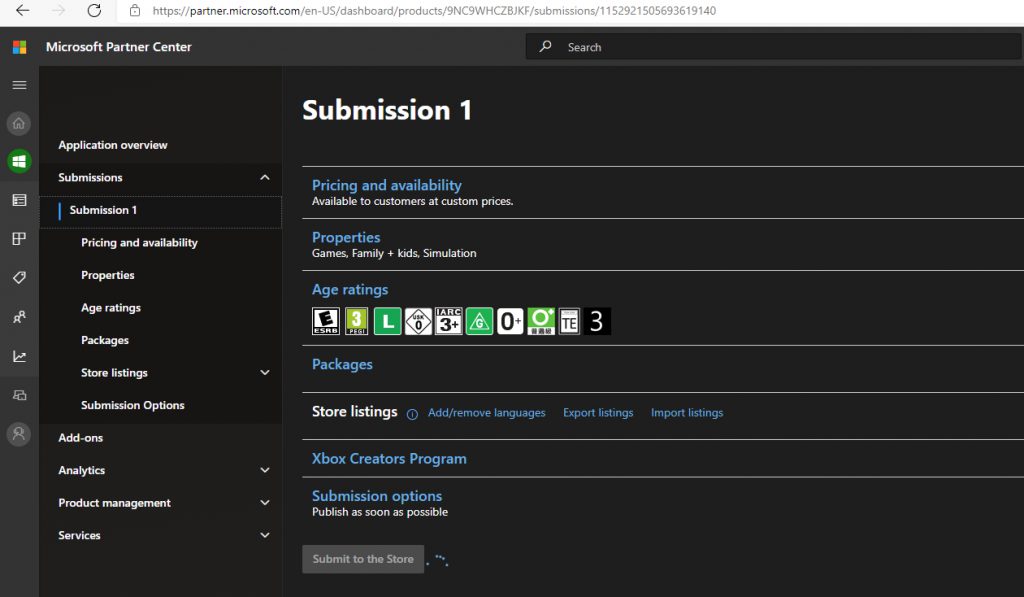
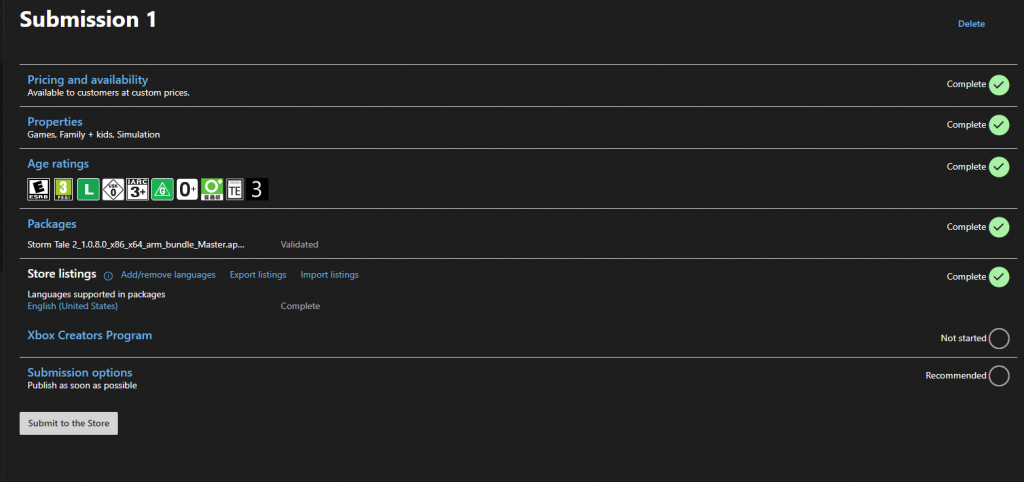
The first thing we need to define is:
1 - “Pricing and Availability”
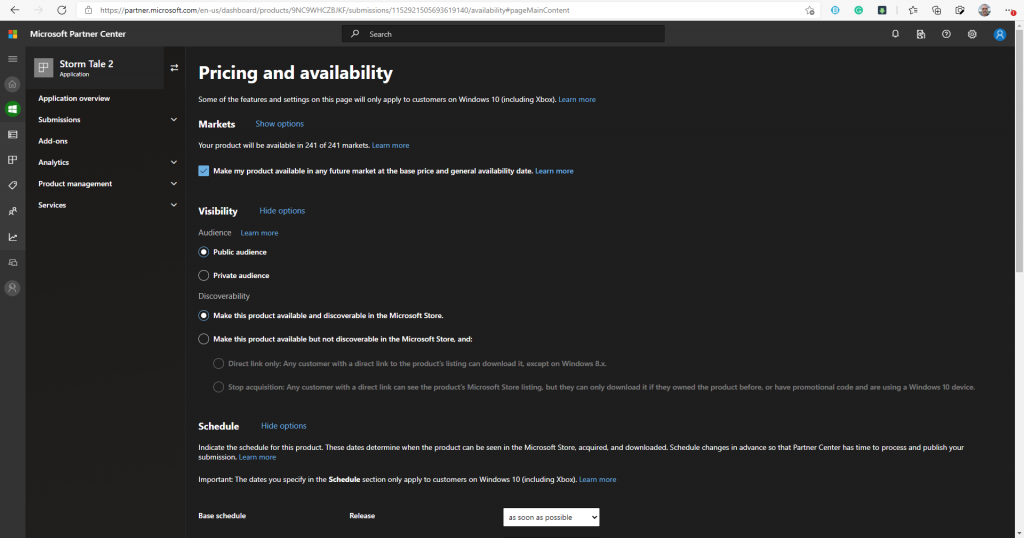
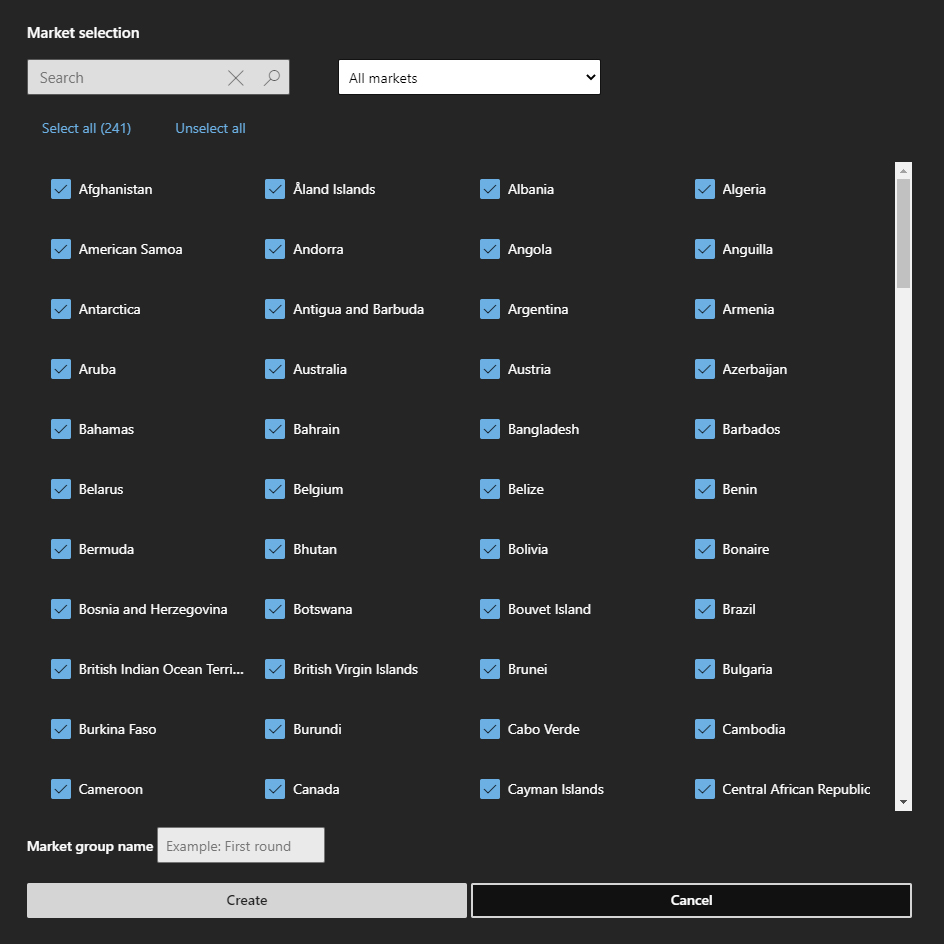
In markets, we define in which countries the game will be available, I always select the default to launch in all.
Em visibilidade, escolhemos entre “Publico em Geral” e** “Publico Particular”**. Como queremos que o jogo esteja disponível para venda no mundo inteiro, escolhermos “Público em Geral”, e marcamos a opção “Torne este produto disponível e detectável na Microsoft Store”.
In Agenda, we select when the game will be available after approval. You can choose “As soon as possible” or set a release date.
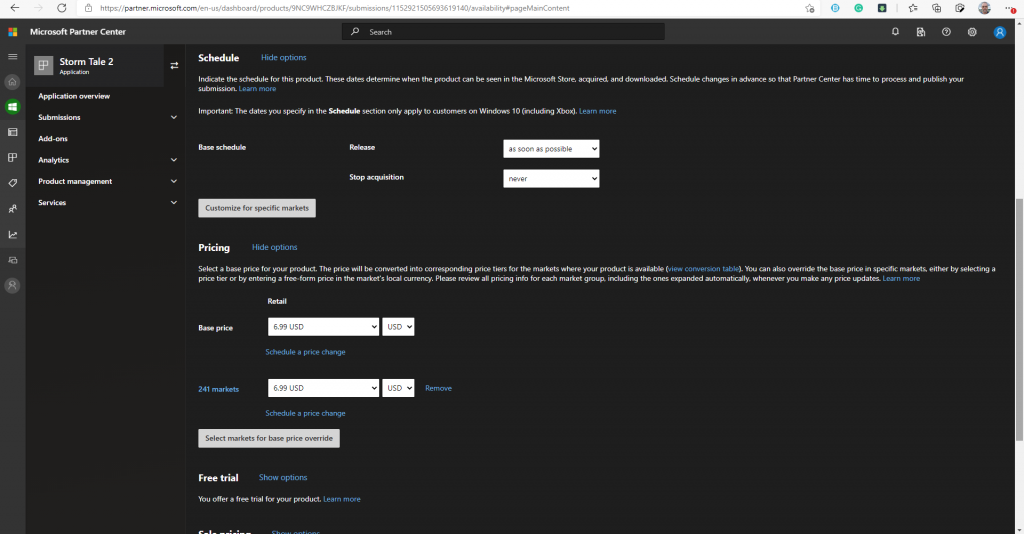
Most importantly now, Prices. The Microsoft Store accepts as many Free games with In-App Purchases as Paid games. You define this by choosing the base price, and then click on “SELECT MARKETS TO REPLACE THE BASE PRICE”, click on Select All and then on Create.
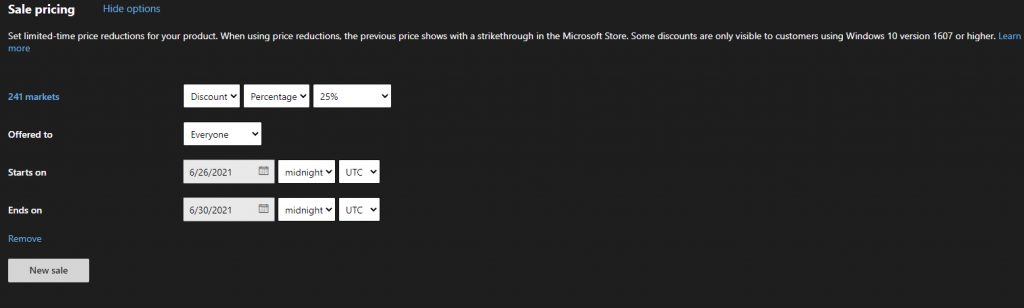
In “Sale Price” you can set limited time discounts for your game. This is a great way to advertise as discounted games are featured prominently on the Microsoft Store. You can define the type of discount, and how long it will be available.
The last thing you need to define is FREE TRIAL, where you define if the user will be able to test your game before buying.
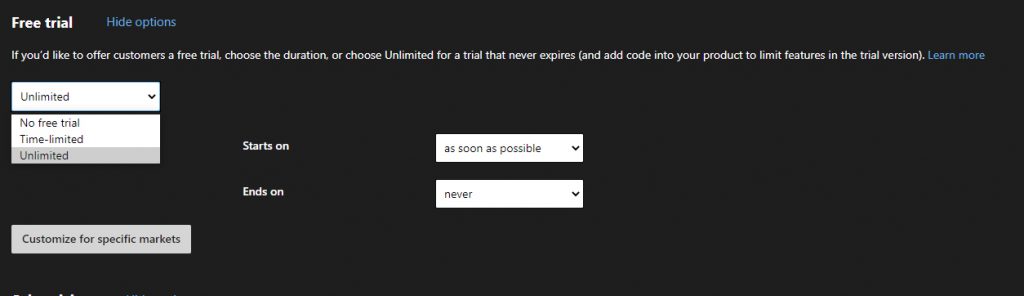
Then we have the following options
- No Free Trial
- Limited Time (1, 7, 15 or 30 days)
- Unlimited
In the case of Limited Time, the Microsoft Store controls the game's demo time, without you having to code anything related to it.
In the case of Unlimited, you need to control the programming of your game (To Remove some features or give some limit until the game is purchased).
In case you are using Unity, we have two APIs that help in this process:
IsAppOnTrial
Returns if the game is running in Windows Store Trial mode and has not yet been purchased!
Unity - Scripting API: Windows.LicenseInformation.isOnAppTrial (unity3d.com)
PurchaseApp
Opens the screen to buy the game
Unity - Scripting API: Windows.LicenseInformation.PurchaseApp (unity3d.com)
2 – Propriedades
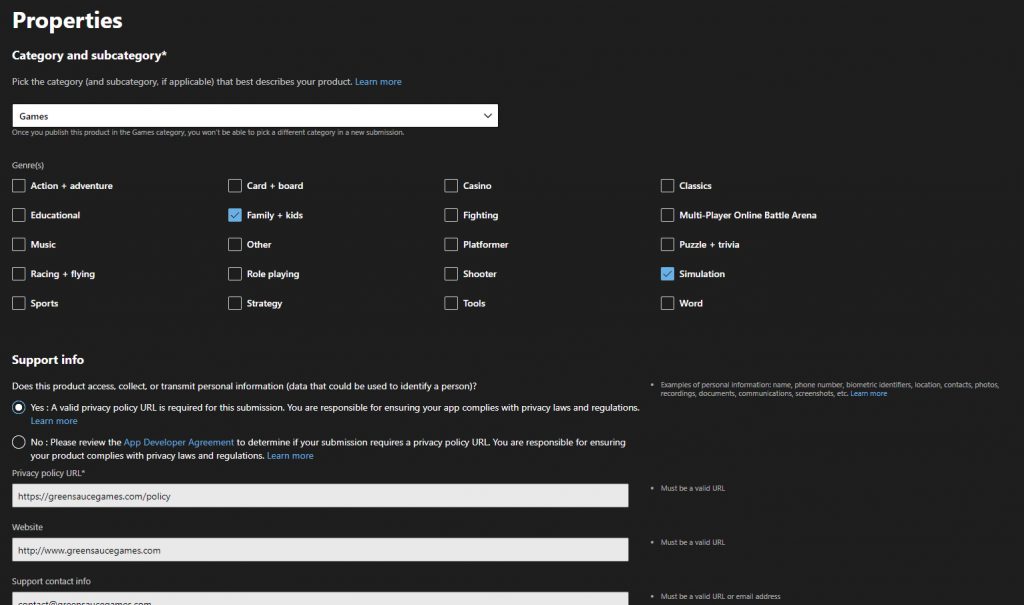
Here we need to select the category and subcategory of our APP, which in this case will be GAMES, and subcategory you choose what is interesting.
If your game collects any type of user information, you must enter a privacy URL.
In Game Settings, you define if it is Single Player/Multiplayer, only for PC or also for XBOX, among other informations.
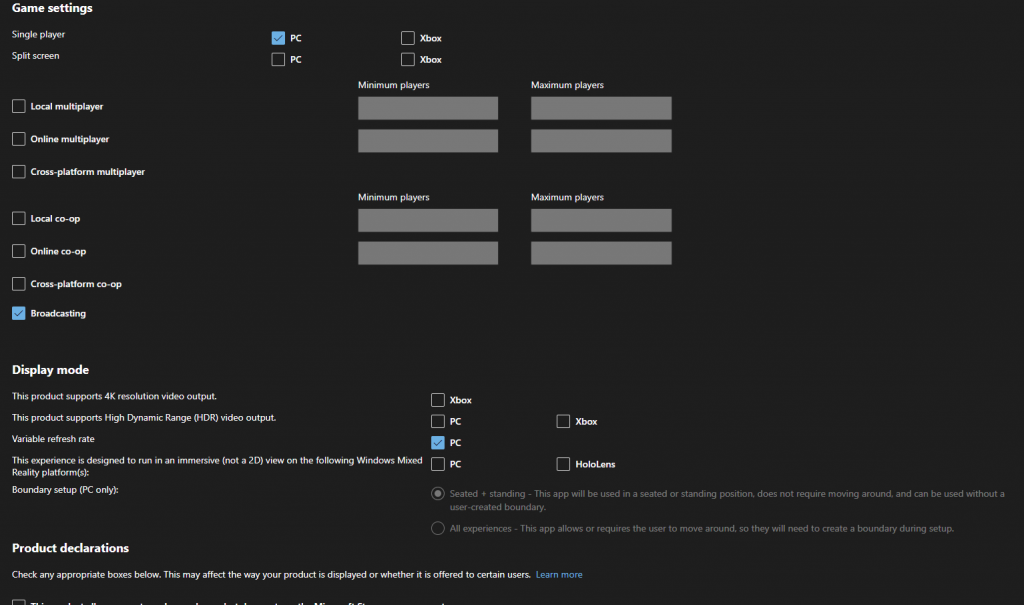
So we need to set the options accordingly in Product Declarations and System Requirements.
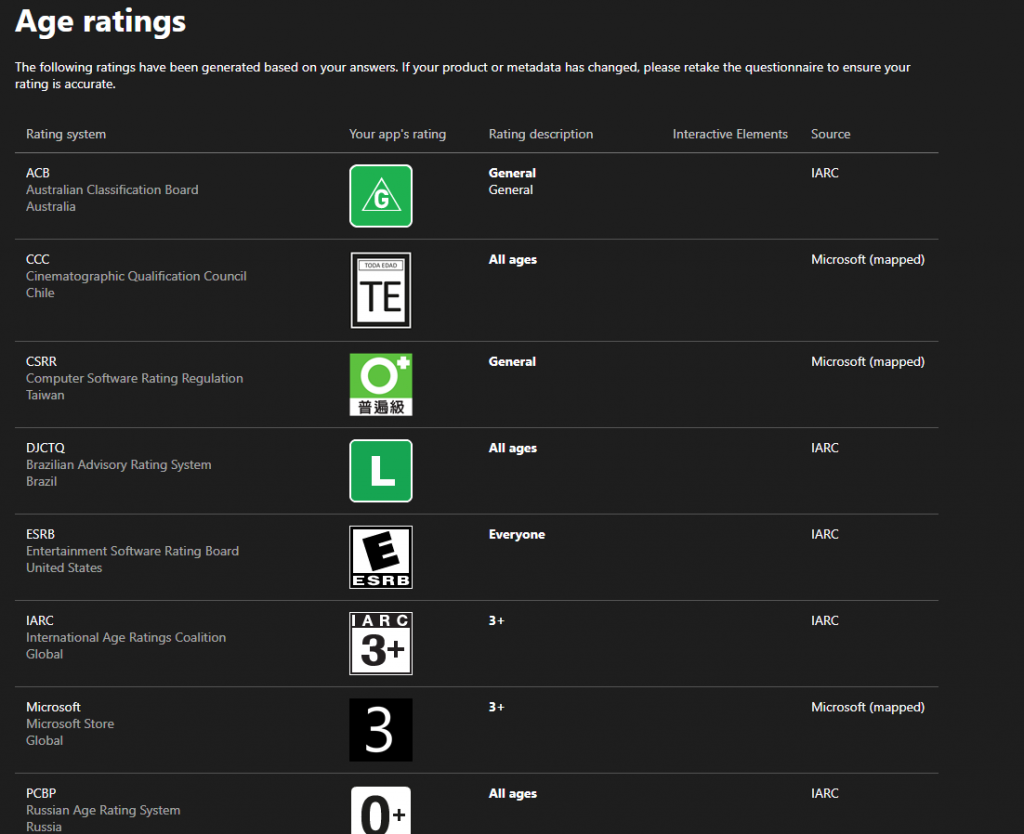
3 – Age Ratings
Aqui você vai definir a classificação etária para seu jogo. Você responde o questionário sobre o tipo de coisas que seu jogo tem, tipo violência, sangue, entre outras coisas. Você responde tudo e clica em “Salvar e Gerar”, e ele automaticamente já gera a classificação para seu jogo.
4 – Packages
Now you need to upload the first build of your game.
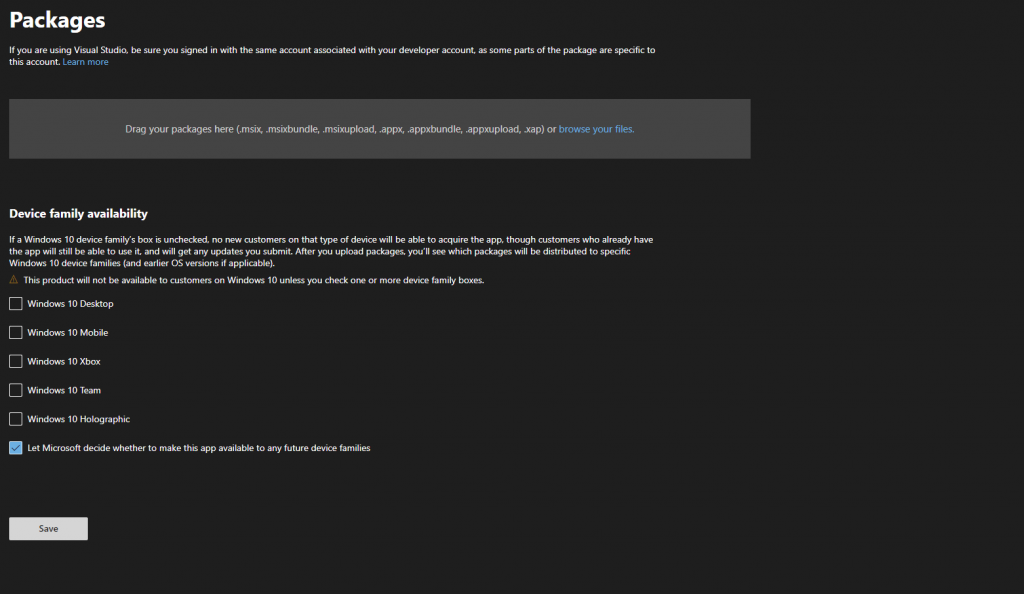
In Unity, you will need to generate a build in “Universal Windows Platform” format.
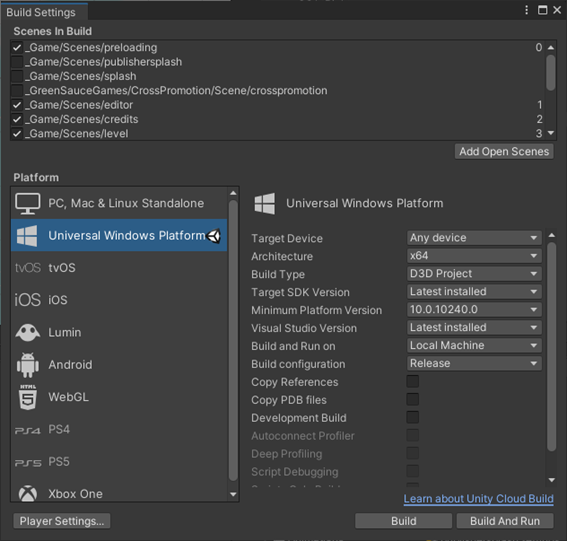
After generating the Build, a new Visual Studio Project will be generated. Let's open this project:
To test it, we first change the platform from "Debug Arm" to "Master X64", and in Solution Explorer, we right-click on the Game project and select "Set as Startup Project". The other 2 projects there (Unity Data and IL2CppOutputProject) are part of the build but cannot be run, so you need to select your game project. Then just click on the Play button where it says "Local Machine".
Now let's generate the build to send to the store!
We select Project - Publish- Create App Packages
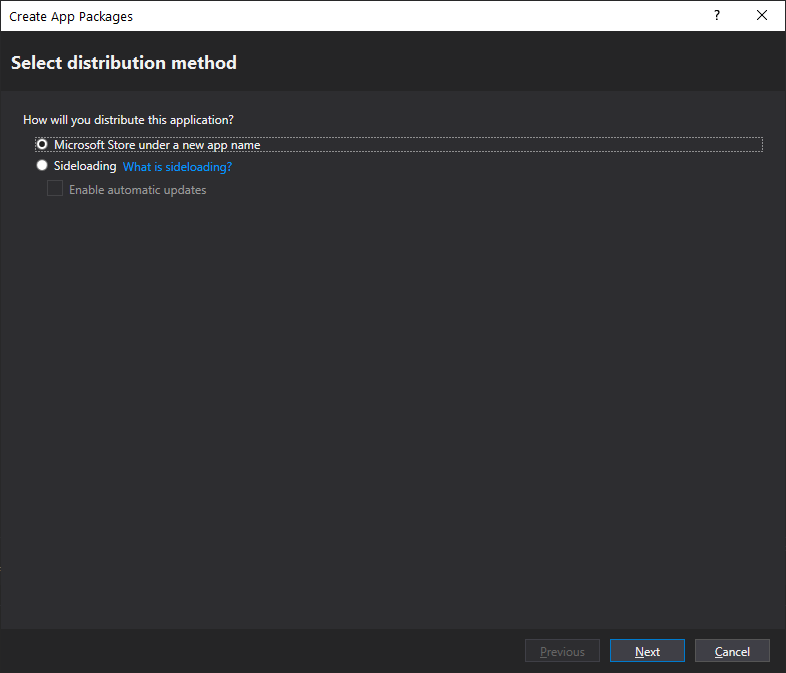
On the next screen, you log in with your Microsoft account, and select your APP that you have already started registering through the portal.

Then, we select where the Build will be generated, the version (if you want to set it manually, uncheck "Automatically Increment"), and which architectures your build will be selected for. Select them all, which will ensure it is compatible with as many devices as possible. Don't forget that Solution Configuration is set to Master. And Generate App Bundle I prefer to leave it as Always, so it will only generate one file as a result instead of 1 for each platform.
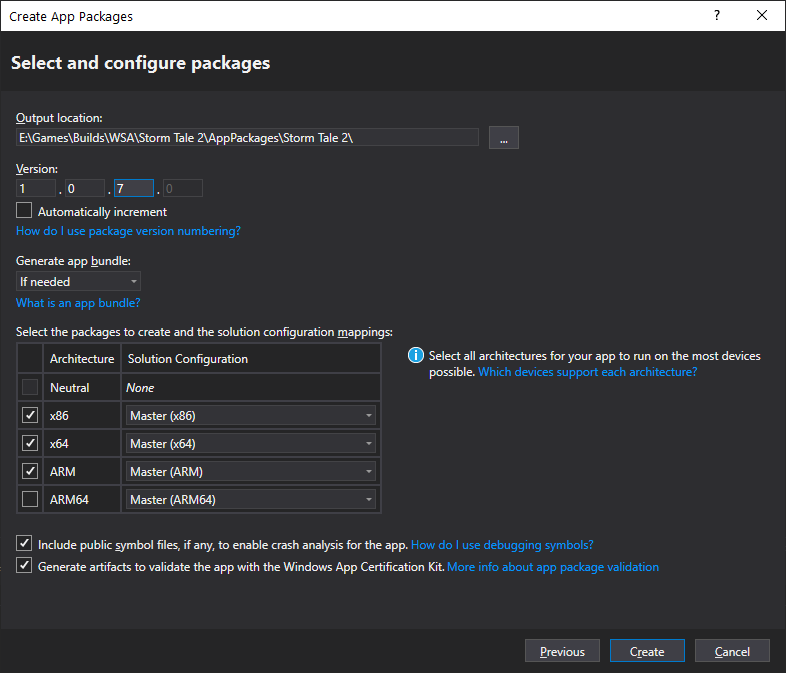
Then just click on Create and wait for the build to be generated.
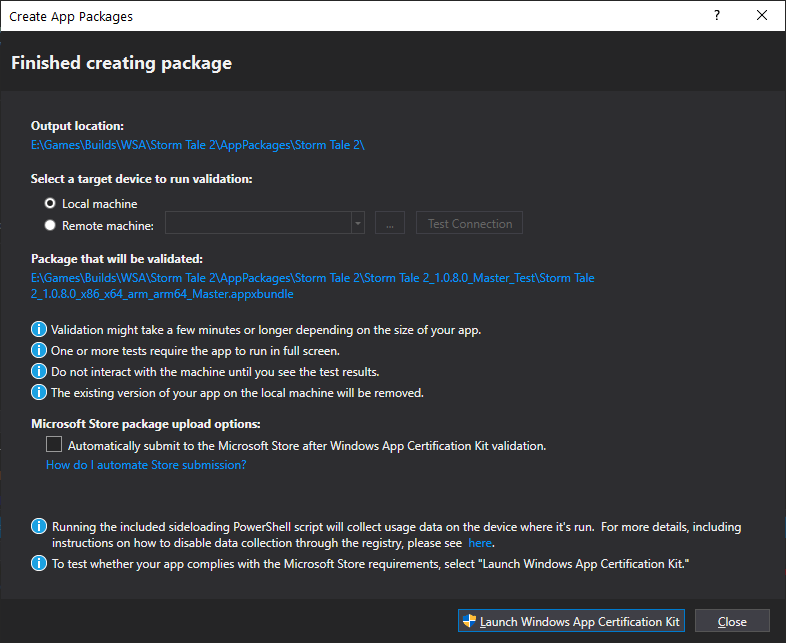
Okay, we can click on "Launch Windows App Certification Kit", it will test if everything is according to the build. With that ready, just send the appxbundle file that was generated in "Packages" in your game's Submission.
After submitting our version of the game, let's go to the last step:
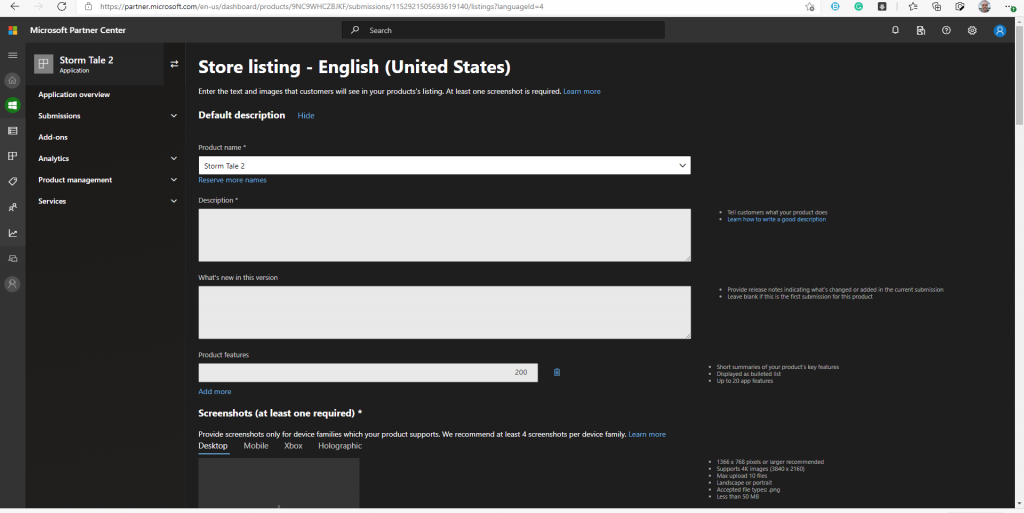
5 – Store Listing
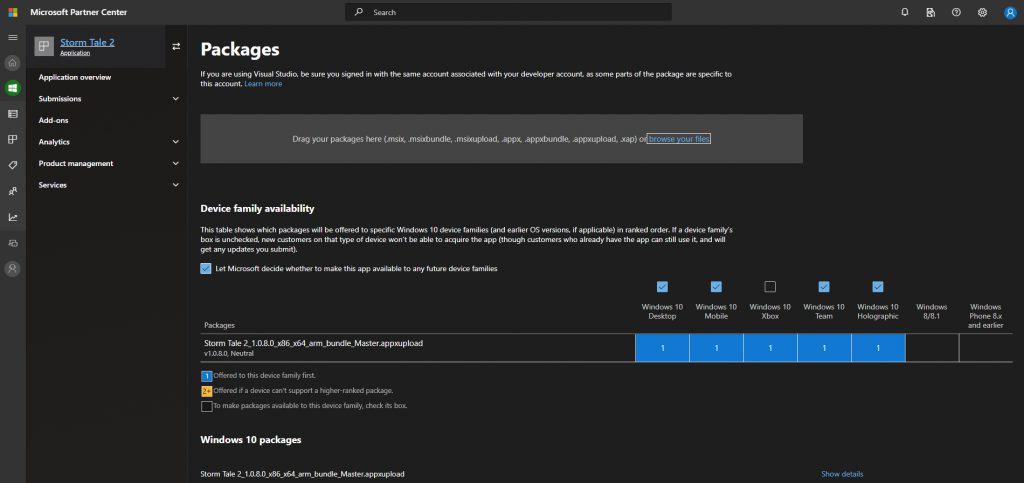
In store listings, this is where we put all the information about our game, description, trailers and screenshots, as it will appear in the Store. The Microsoft Store supports multiple languages, and you have the option to create a different page for each language if you wish.
All the required information is pretty self-explanatory, just fill in all the required ones and you won't have any problems.
6 – Submission
After everything is ready, just click "SEND TO STORE", and that's it. Just wait for Microsoft to approve, and your game will be available for sale!
Links
Became a Microsoft Developer - https://developer.microsoft.com/pt-br/store/register/
Microsoft Partner Center - https://partner.microsoft.com/pt-br/dashboard/windows/overview
Unity documentation about LicenseInformationhttps://docs.unity3d.com/ScriptReference/Windows.LicenseInformation.html

Related reads
Explore by topic
FAQ
How to become a Microsoft Store Developer?
First, you'll have to apply to become a Microsoft developer. This can be done at this link: